
Printable STEM activity: 18 mechanical toys kids build from a cereal box
Ordinary carton board becomes a wonderful mechanical toy.
Let’s print the blueprints at home or school, glue them onto a cereal box or any thin carton board, and build working mechanical toys. We can make eighteen of them, at six levels of difficulty. Chances are, everything we need is already at hand. See you in the assembly videos!
One .zip download. Best for Grades 4 to 8 (ages 9 to 14). Grown-ups and seniors also love toymaking.
Hands-on STEM activities for classrooms and homeschool: levers, linkages and mechanisms
You Probably Have Everything You Need
Start building with the blueprints and:
- Printer and paperLetter or A4, printed at 100%
- A cereal boxor any other thin carton
- Glueto assemble a durable toy
- Scissorsto cut the black lines
- A rulerto fold the red lines
From cereal box to mechanical toy
- 1
Print the blueprints
Image to comeimages/steps/1-print.webp · 4:3Print on regular paper at 100% scale. Every blueprint page has a 100 mm bar so we can check the size.
- 2
Glue them to a carton
Image to comeimages/steps/2-glue.webp · 4:3Glue each blueprint onto the printed side of a cereal box or other carton.
- 3
Cut the black lines
Image to comeimages/steps/3-cut.webp · 4:3Solid black lines are cut lines.
- 4
Fold the red lines
Image to comeimages/steps/4-fold.webp · 4:3Lay a ruler along each red dashed line and fold against its edge.
- 5
Assemble our toy
Image to comeimages/steps/5-manual.webp · 4:3We can use the manual, printed or on screen.
Image to comeimages/steps/5-video.webp · 4:3We can watch the YouTube video.
- 6
Then, imagination takes over...
Image to comeimages/steps/6-decorate.webp · 8:3When we're done, the toy is blank and ready to be painted and decorated however we want. Salvage carton board scraps to add horns, tails, ears, hats, clothes, anything that we think is fun!
Made by real toymakers
Children at Tom Bast’s weekly workshops, with the toys they built.
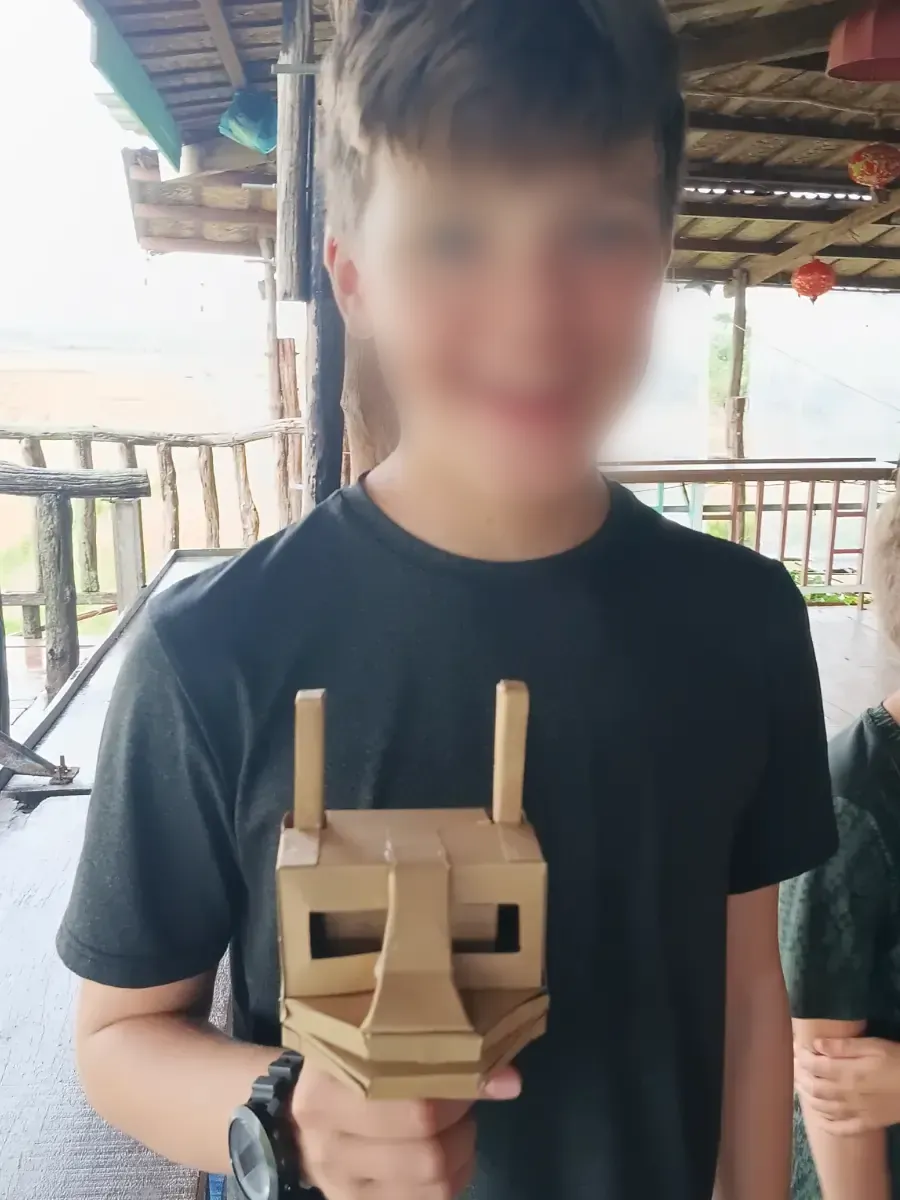
Laughing Dragon, Crafting Tier 6
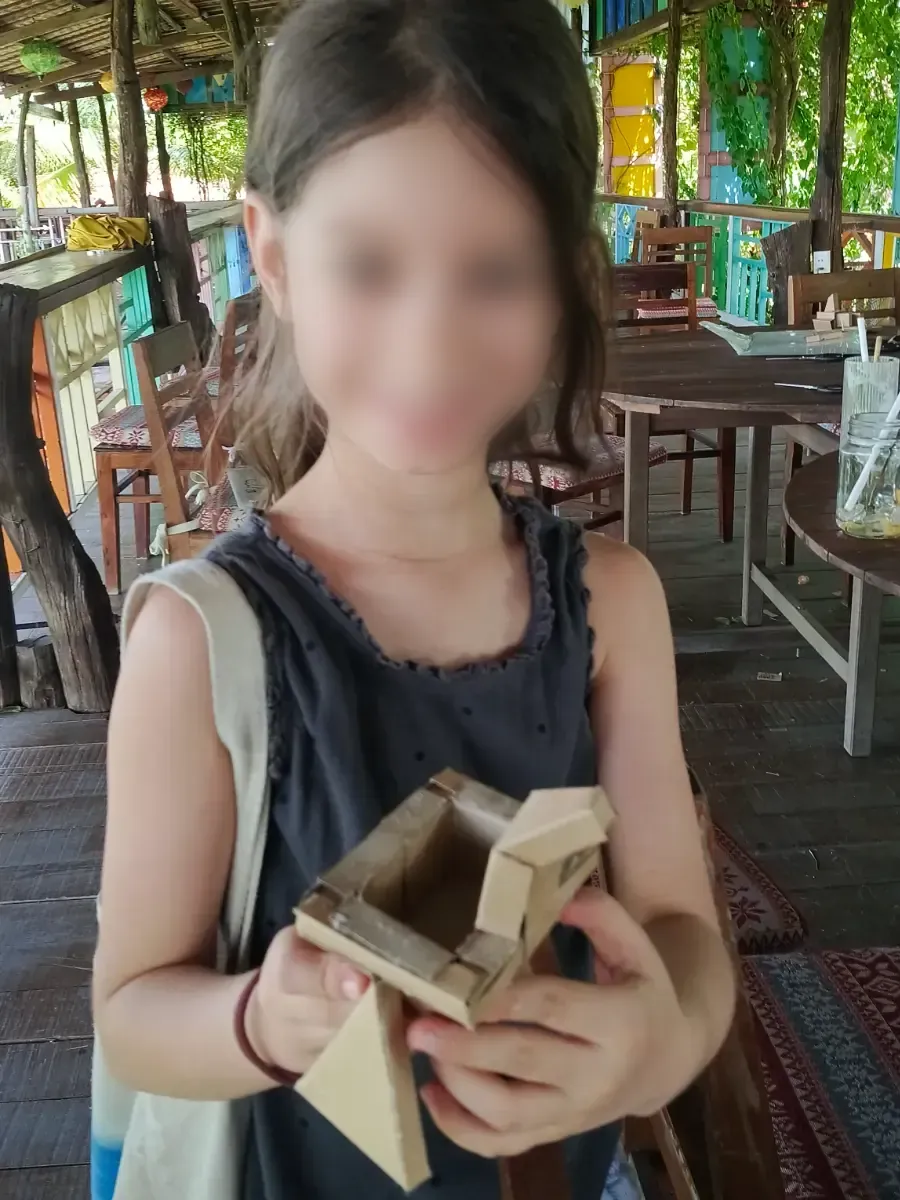
Bird Bus, Crafting Tier 3
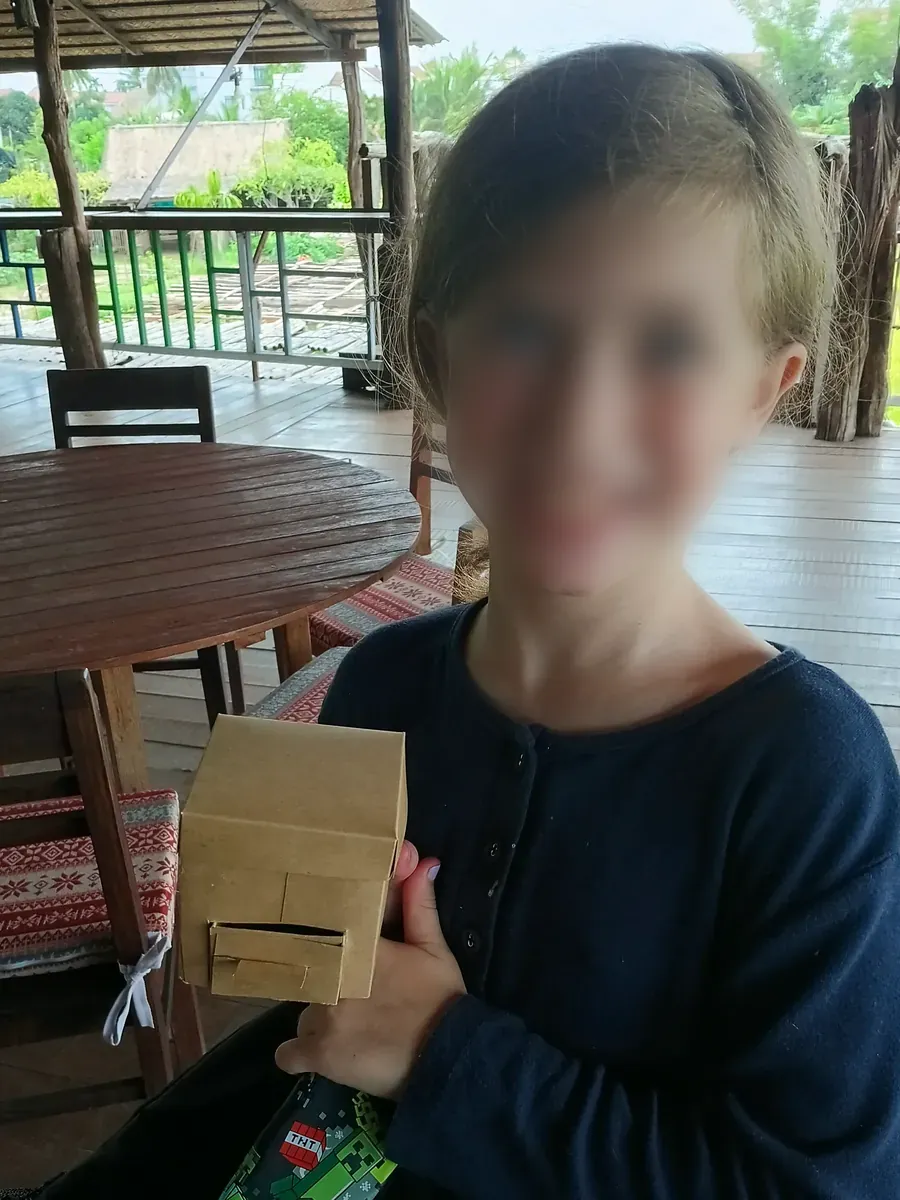
Magic Box, Crafting Tier 6
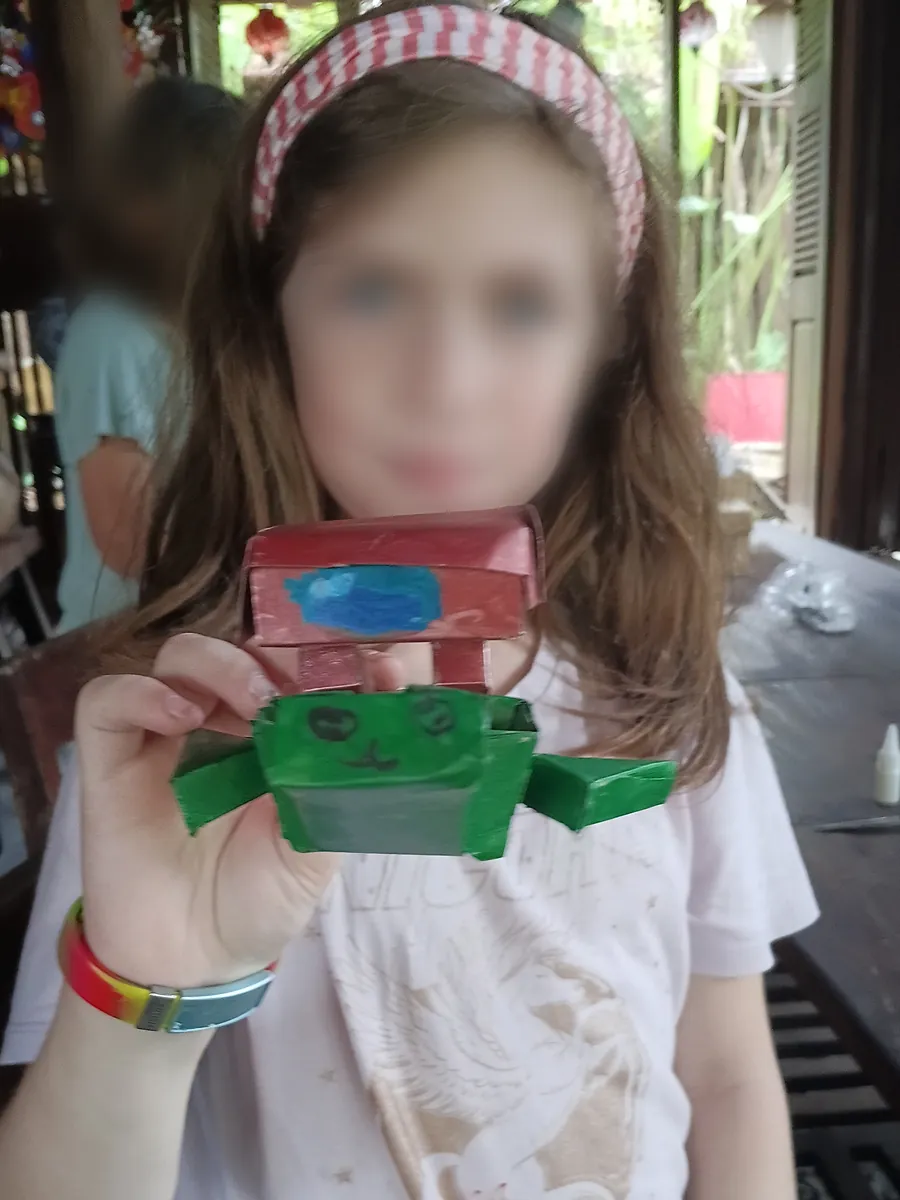
Turtle Taxi and Hopping Monster, Crafting Tiers 2 and 3
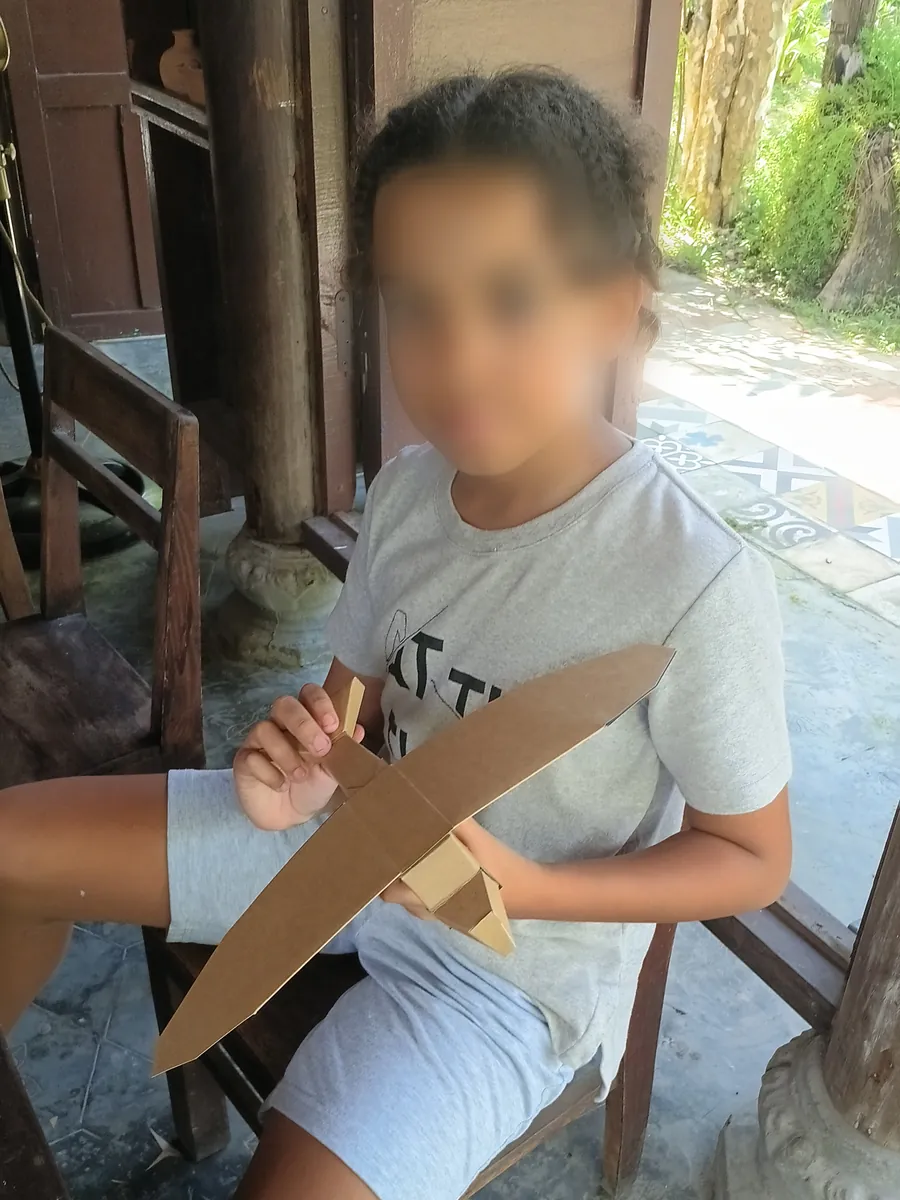
Falcon, Crafting Tier 6
How to use toymaking for workshops
Effortlessly fill a semester-long enrichment course where learners take home toys they make so they can show their parents and siblings how they work.
Prep and management for a weeks-long course is easy. Projects can be paused at any point, and successfully picked up again at the next session. There is always another toy to make or extension activity to do.
Our toys are also called paper automata, and making them enables any educator, homeschooler or enrichment coordinator to provide hands-on mechanics and engineering experiences. Everything here is designed to make implementation easy, to support educators, and to lead to high learner success.
Extremely low cost-per student
Especially if recycled cardboard can be used. Gluing the blueprints to the printed side of a carton works beautifully. It also adds a geometric puzzle, to fit the parts onto the available carton board. Ongoing expenditures are limited to printing on paper and glue.
The blueprints can also be printed directly onto 300 GSM or 110lbs carton board. Some, but not all, personal printers and school-sized printers can print on carton board. Local commercial printers usually have our carton board in stock and can print on demand. They often sell blank carton board, which can also be purchased online.
Easy Management Options
Educators can guide a class through the same toy at the same time. This makes it simple to use one screen for several learners and to encourage learners to help each other. It also means that everyone will take home the same toy at the same time. Students who finish early can do the extension activities. They can also decorate their toy, an activity that every learner loves.
It’s a joy to oversee a toymaking session where every learner works at their own pace. This is the way I manage my workshops. Most learners take home a toy every 90-minute session. Some finish one and start another, which they finish at the next session. Sometimes they dwell on extension activities. It’s easy to manage a class in this way. I don’t include decorating in my workshops - all the photos of decorated toys are ones they proudly brought back to show me.
To provide a completely screen-free, battery-free experience, we can print out the manuals. The manuals are reference and only need to be printed once. I do my workshops without screens, and so I have the manuals laminated and spiral bound.
Clear Progression
Learner success is supported at every step. Color-coded blueprints show which panels meet, so flat carton board becomes a three-dimensional part without guesswork. The illustrated manuals repeat those colors and explain the whole assembly. The video shows the same thing they are holding in their hands and walks them through a successful build.
Both directed and self-paced, learners succeed best when they advance from the easier Crafting Tiers to the harder ones. This is the only “rule” that merits enforcing. Learners are highly motivated to finish their toy, and they will want to have the more difficult toys. But if they try to make the Laughing Dragon or the Falcon on their first day, they will be frustrated. We guide them to early successes, and then progress them to more complex machines.
Simple Preparation
Preparation for a session is extremely simple: each learner should have their own pair of sharp scissors. They should have their own ruler for folding and for many of the extension activities.
They need glue. The best choice for glue is a quick-drying craft glue. Show your learners how to use a small amount of it, spread thinly by rubbing the surfaces together. Watch the How-To, Safety and Pro-Tips video to see exactly how. This method dries the parts quickly enough for the learner to progress steadily.
Finishing Is Just the Beginning
Once completed, the toys can be used for the extension activities, which enable educators to address various educational standards.
The toys are also blank slates, begging for faces and decoration. Learners will bring them to life, and they are perfect for playing pretend, film making, photography, and gifting.
Most of all, there’s the self-esteem we get from having a mechanical toy that we made ourselves. We get to keep it, and take it home, and make it ours.
Real machines, real words, real engineering.
The blueprints and assembly manuals use the words engineers use.
- Actuator
- Alignment Guide
- Barrel
- Bolt
- Brace
- Bracket
- Channel
- Chassis
- Connecting Rod
- Cover Plate
- Double Slider-Rocker
- Driver
- Flexure Hinge
- Follower
- Fulcrum
- Gantry
- Hinge
- Housing
- Lamination
- Lever
- Mechanical Stop
- Mounting Flange
- Pivot Point
- Push Rod
- Rocker
- Slider
- Spacing Block
- Spiral Reinforcement
- Standoff
- Swivel Guide
- Transition Fit
- Viewport
- Web
All 18 toys, ready to build today.
One .zip download holds all eighteen toys, including:
- The blueprints
- A fully illustrated assembly manual
- Standards-addressing extension activities
- Every page personalized with a name or title (up to x characters)
The finished toys are meant to be decorated and played with. They’re perfect for film making, gifting, and keeping.
The experience of making them is magical.
Terms & Conditions apply.
Price to be set
- 25+
- hours to make just one of each
- 33
- mechanical & engineering terms
- 6
- crafting tiers, from beginner to expert
- 105
- parts to cut, fold and assemble
Questions
What is Toyineer?
A .zip download of blueprints and illustrated assembly manuals for 18 working mechanical toys. We print the blueprints at home, glue them to a cereal box, then cut, fold and assemble.
What do I need to build a Toyineer toy?
A printer and paper, a cereal box or other thin carton, glue, scissors and a ruler.
What ages is it for?
Best for Grades 4 to 8 (ages 9 to 14). Grown-ups and seniors also love toymaking.
How long does it take?
25+ hours to make just one of each.
Which paper size should I print on?
The blueprints come in Letter and A4. Print at 100% (no “fit to page”), then measure the 100 mm bar on the page to check the scale.
Which toy should I build first?
Start with a Crafting Tier 1 toy: Vanisher, Gotcha Box or Starling. The tiers go up to Crafting Tier 6.
What is carton board?
The thin board that cereal boxes and other food cartons are made of. Glued to a printed blueprint, it is stiff enough to make working hinges, sliders and levers.
Is carton board the same as cardboard?
“Cardboard” is the everyday word for any stiff paper board. Carton board is the correct name for the thin, single-layer board that cereal boxes are made of, and it is what these toys are designed for. Corrugated cardboard, the thick board used for shipping boxes, is a different material.